
Sending Mail Internationally
Have some presents to ship back home? Or are you leaving Japan and need to send the entirety of your wardrobe back? This article is designed to help you mailing a package internationally with JP post! Please note that to post internationally, you need to print specific documents and slips beforehand, so having access to a printer is important.
You will also need to be aware of country-specific regulations, but as a guide, things like sending high content alcohol, fresh food, aerosol products and flammable liquids is not permitted in Japanese mail.
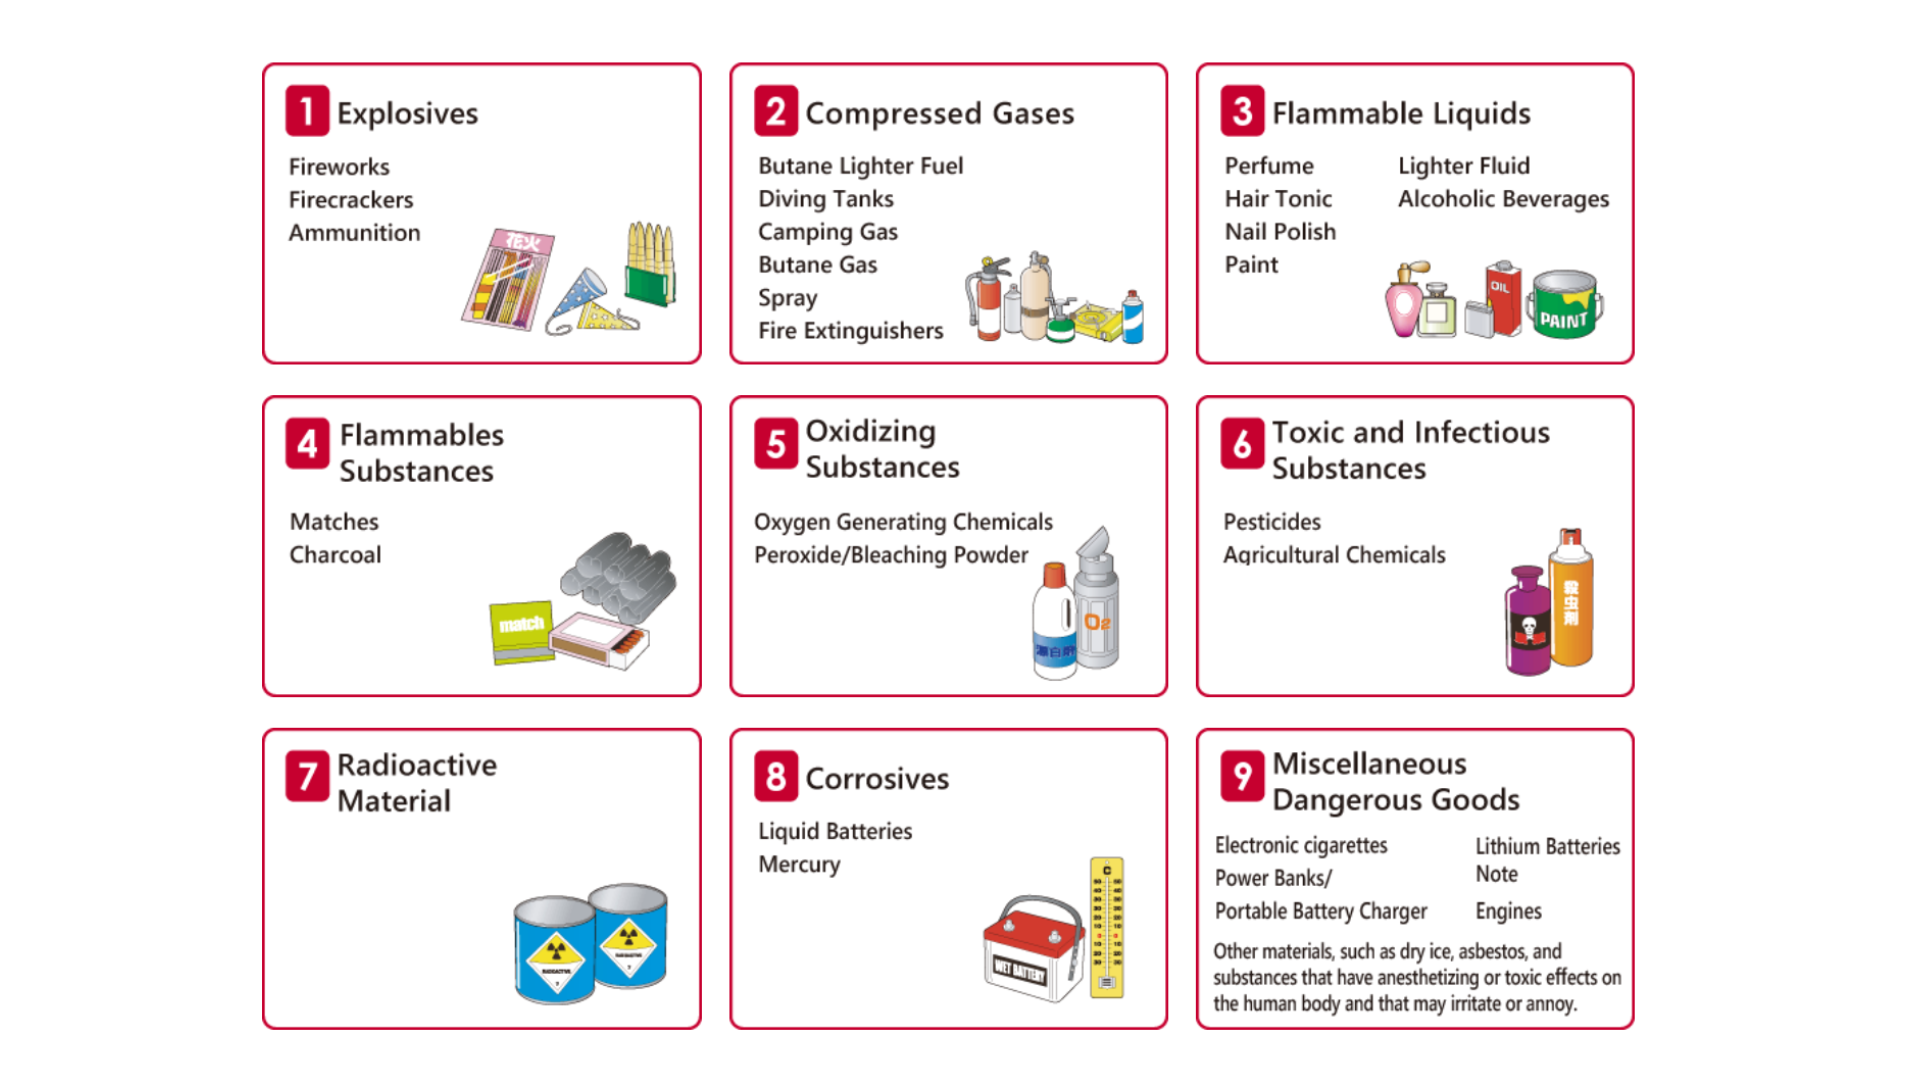
from JP Post International Mail Site
Part One: Before the Post Office
Luckily, the JP post page is all in English to help you along the way. Make an individual account on the ‘International Mail My-page’ service. Using an account isn’t necessary, but it helps saving your senders and recipients addresses if you send mail often.
https://www.int-mypage.post.japanpost.jp/mypage/M010000.do?request_locale=en
Step One: Making a Label
Go to ‘Online Shipping Tools’ in your account and click ‘Create New Labels.’
Enter your details as sender’s details (if you made an account, you can save this in your online address book for ease in the future)
Next, enter your recipients address and details. This is who you’re sending the package to
Step Two: Mailing Type
Now you choose your mailing type. Air is the most expensive but the quickest and safest way of transporting mail. Packages can arrive within as little as 7 days to the intended destination! It is suitable for all types of mail (letters, small packages and parcels) but can be very expensive for larger packages. SAL is currently unavailable as of Summer 2026 for mailing. Surface mail is recommended for larger parcels, such as clothing or for leaving JETs mailing objects back home, but it will take several months to arrive at its destination as it’s taken by boat across the sea. For this reason, it’s more cost effective.
Select the parcel type (letter/documents for flat envelopes, small packets for envelope pouches or bulkier envelopes, and postal parcels for larger boxes) Check the dimensions on the website and measure your parcels if you’re unsure.
Step Three: Register the Contents of your Mail
Next, you must register all the content in your parcel and its value. Entering the weight is not necessary. You don’t need to be super specific about the content types, and if you’re unsure, use the drop down menu to find an option. For example, clothing can be listed as ‘Sweaters’ or matcha kitkats can be labeled as ‘Biscuits’. You can also approximate the prices if you don’t remember exactly, this is just used to calculate if the recipient needs to pay custom/tax fees (an additional charge for parcels worth a certain value.) Note: adding the HS code is also optional and not necessary.
Make sure to label your parcel as ‘gift (non commercial)’ to avoid unnecessary taxation, fees or examinations.
Please double check your parcel doesn’t contain nonmailable articles at this link https://www.post.japanpost.jp/service/send/oversea/attention/restriction/index_en.html
Parcels may be refused, seized or destroyed, and you could be subject to fines
There are items prohibited throughout the world, then also by destination country. When you arrive at the post office, you will also be given a physical form to check to say you have not included these items. They may also question you about items such as cosmetics, to check they are no aerosols or contain alcohol.
Step Four: Preparing to Print
Next, select your shipping date and print out the required documents. Again, you do not need to include the weight, as this is done for you at the post office. Click ‘no commercial value’ at the bottom for gift items.
Double check all the information is correct, then click ‘register shipment.’
The final step is to print the required documents and then you are ready to go to the post office.
Part Two: Preparing your parcel/documents to be sent
If it is an envelope, please write clearly the address on the front. For postal parcels, the post-office attach a special pouch to the box with the shipping details, so it is not necessary to write the address. Make sure your mail is secured and protected as it will be travelling a fair distance!
With your printed documents, make sure you have signed and dated the boxes required on each sheet.
Part Three: Arriving at the Post Office
When you arrive, hand over your items to the post worker and state where it is being sent
Ex. ‘ アメリカで送ります。’ (amerika de okurimasu)
They will weigh it for you then take the forms to affix and check. They may ask questions about certain items as aforementioned, so make sure you have a translator app ready if you need. You will need to check, sign and date a form stating you understand which articles cannot be mailed, and hand it over.
They will then ask for payment, give you a receipt and if it is a parcel, hand over a senders copy for your records.
Congratulations, you’ve sent your international mail!
For more detailed information, please use the JP Post website to check as it is a very useful and clear guide with FAQs and many links to help you
https://www.post.japanpost.jp/service/send/oversea/index_en.html